Signal Key

Source
Icon
Message
• TEST
• RJ11
(Landline phone)

Phone call
• EXT TRIG 
(Mobile phone sensor)

Sensor
• EXT TRIG
(Other accessory)

Visitor


On startup, the watch will walk you through the initial setup.
Alternatively, watch the video or follow the steps below for more detailed instructions and to take advantage of additional features.
No match yet. We'd rather find you a real answer than have AI confidently improvise one.
This Watch Receiver is part of the alerting system from Bellman, and it will help you notice important signals in your home. So, for instance, when someone rings your doorbell, you will get a notification on your watch that you have a visitor.


When e.g. your doorbell rings, the Visit door transmitter is activated and signals your watch.
Your watch alerts you with vibrations and shows you what’s going on.
The system offers a variety of setups to help you keep a watchful eye on your home and loved ones.

Get emergency notifications from connected smoke and CO detectors.

Use doorbell sensors to notify you if someone rings your doorbell.

Use a baby monitor to know when your child needs your attention.

Get an alert on your watch when you have an incoming call or message.
Charge the battery before you use your watch for the first time, or when you haven’t used it for an extended period.

The first time you charge your watch; it will start automatically, and you will be asked to select language. The battery indicator will not be visible initially.

Connect the charging cable to an USB A power adapter or a USB A computer port.
Attach your watch to the charging dock, making sure that the charging terminals  align. It will start automatically.

The battery indicator on the watch face turns green to show that the unit is being charged. It can take up to 2h to fully charge it.
Normally you’ll leave your watch on all the time and use your wrist to wake up the screen and put it to sleep.
To wake up the screen, raise the wrist.
You can also press any of the side keys.
To turn off the screen backlight, lower the wrist.
You can also press the Home key briefly.

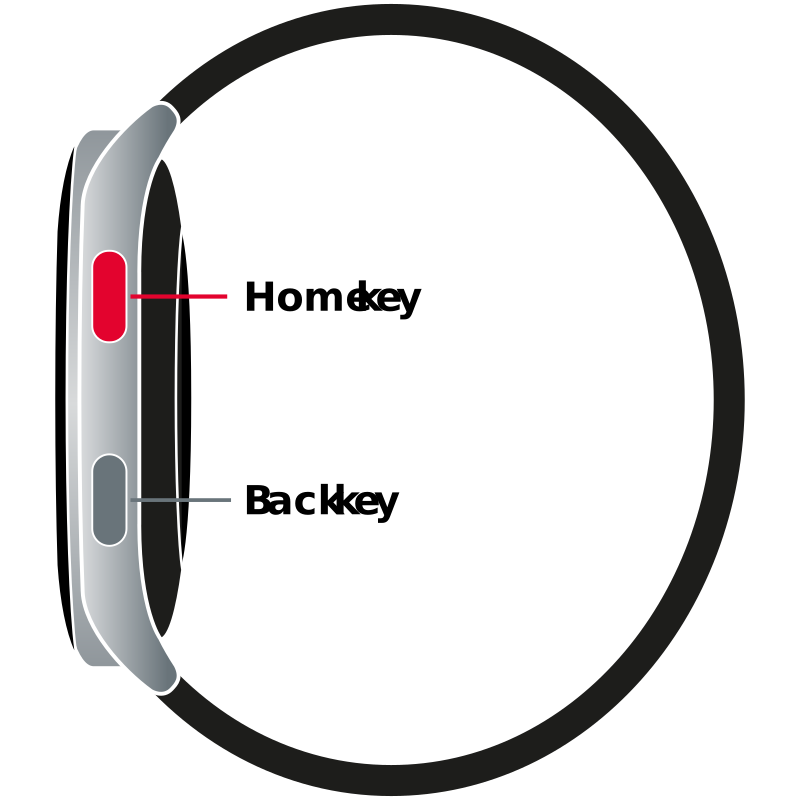
If you plan not to use your watch for a while, hold down the Home key to turn your watch off to save energy. If your watch has been turned off for an extensive period, it may revert to its default time. When you charge your watch, it will need up to 30s to synchronize with the system.
The Home key
The Back key

Press to go back to the watch face.

Press to open the menu or go back one step.

Hold down to turn your watch On or Off.

Hold down for 4s to call for attention.
When you turn on the watch for the first time or reset it, follow the steps below to pair it to your system. Before you begin, make sure the units are close to each other.

Unpack the bridge and remove the battery pull tab to start it. The top LED will begin to breath in blue.

Unpack your watch and place it in the charger for 15 min. Remove it from the charger, select your language and your watch is ready for pairing.

Hold down the bridge top test button marked  until the LEDs start to blink alternately. Your watch will let you know when it has been added to the system. Tap OK.

If you are using the Assistant app, the system time is shown. Tap Edit  to fine tune the time manually or tap Done
  to complete the installation.
If you are not using the Assistant app, you will be asked to set the time and date manually.

Select between 12-hour and 24-hour time format and tap Next  to set the time.

Select the hours or minutes and tap the red arrows to adjust the time. Tap Next to set the year.

Tap the red arrows to set the year and tap Next to set the date.

Select the month or day and tap the red arrows to set the date. Tap Next to complete the installation.
Make sure to test the connection after you have completed the installation, or when you haven’t used your system for an extended period. If the connection fails, go to Troubleshooting for guidance.

Press the top test button marked . The top LED lights up in blue to show that a signal is being transmitted.

A message appears on your watch and mobile phone to confirm that the units are connected to your bridge.

Press the bottom test button marked  . The bottom LED lights up in green to show that a signal is being transmitted.

The yellow LED lights up and it starts to sound, flash or vibrate depending on your type of receiver.
When you add a transmitter to your system, the associated notification will automatically be added to the Notifications panel.
Learn more
Read the transmitter’s user manual to learn how to add it to your system.

Push the Test buttons on the transmitter you want to add.
In this example we are adding a Visit Baby Monitor.

Your watch starts to vibrate, and the associated notification appears on your watch face.

Press the Home key, Back key or tap the screen to silence it.
Your watch will return to the watch face.

The first time you activate a transmitter, the associated notification  will be added automatically.
To signal for attention, hold down the Back key for about 4 seconds. The Visit receivers around your home will sound, flash or vibrate to notify your family members.
Please note: The first time you signal for attention, the app will only add it to its Notifications list. Send the notification once more to ensure the signal is received on all devices.

Hold down the Back key for 4 seconds to signal for attention.

Tap Stop or press any key before the countdown has reached 1 to cancel and return to the watch face.

Tap OK to acknowledge and return to the watch face.
If you don’t tap OK, it will return to the watch face after 30s.
Your Watch Receiver offers a selection of watch faces to choose from. No matter what design you choose, the watch will feature three complications: Date, Battery status and Notification history. But if the watch is out-of-range or if the notifications are turned off, red symbols will temporarily take their place to notify you.

Date
Displays the day and date.
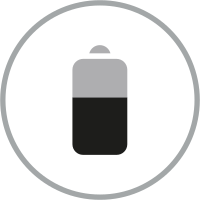
Battery status
Indicates the current battery level.
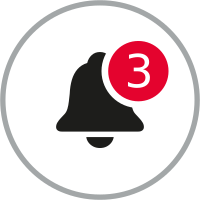
Notification history
Shows the number of missed notifications.

Out-of-range
Warns when your watch is out-of-range.
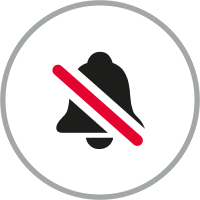
Do Not Disturb
Indicates that the notifications are turned off.

In the menu you have access to a multitude of useful features like for instance, a timer and an alarm clock. Here, you can also fine tune your watch to match your needs. To open the menu, press the Back key on the right side of the watch.
Do Not Disturb
Temporarily silence watch notifications.
Timer
Create a custom timer or select a preset.
Alarm
Set, snooze, and turn an alarm On/Off.

Night Mode
Reduce screen glare in low-light environments.

Settings
Adjust watch features to match your needs.

This function will temporarily silence the notifications on your watch. Just pick a preset like e.g. 10, 20, or 30 minutes to activate it. Please note that fire and CO notifications cannot be silenced for security reasons.
To open the Do Not Disturb panel, press the Back key and tap Do Not Disturb  in the menu.

Tap to pick a preset duration, like for instance 10, 20 or 30 minutes.

The Do Not Disturb symbol  shows that it is activated.
Tap the symbol to turn the notifications on again.

The Notifications symbol  re-appears to show that the notifications are turned back on.
The timer can help you keep track of time. You can create a custom timer or select a preset like e.g. 5, 10 or 15 minutes. If you pick a preset, the timer will start right away.
To open the Timer panel, press the Back key and tap Timer  in the menu list.

Pick a preset timer, displayed in minutes, or tap Add  to create a custom timer.

Tap to select the hours or minutes and tap the arrows to adjust the time. Tap Start  to activate the timer.

The Timer  shows the remaining time.
Tap the timer symbol to pause, resume or delete it.

Tap  to restart the timer.
Tap  to delete the timer and return to the watch face.
This section describes how to set, snooze, and turn an alarm On/Off. To open the Alarm panel, press the Back key and tap Alarm  in the menu.

Use the switch  to turn the alarm On/Off.
Tap the alarm time  to edit the alarm.

Tap to select the hours or minutes and tap the red arrows to adjust the time. Tap Done  to go to the Alarm panel.

Your new alarm is turned On automatically.
Tap Done to save the alarm and go to the watch face.

The alarm hand is shown on the watch face (here in yellow).
Use the switch  in the Alarm panel to turn it On/Off.

Tap  to snooze the alarm for 9 minutes.
Tap  to stop the alarm and return to the watch face.

A window appears briefly on your watch face to confirm your choice.

Tap the switch to turn off the alarm.
Tap Done to save your setting and go to the watch face.

The alarm indicator has disappeared from your watch face.
Night Mode reduces eye strain and glare, making it easier to focus on the text in low-light environments.
To activate Night Mode, start by pressing the Back key to open the menu.

Tap to select Night Mode  in the Menu to activate it. Your watch will feature a dark and dimmed watch face.

Press the Back key to deactivate Night Mode. The watch will return to your original screen settings and open the menu.
In the Settings menu you can adjust a multitude of parameters to make your Watch Receiver match your specific needs.
To open the Settings screen, press the Back key to open the Menu and tap Settings  .
.
Screen 1
Time and Date
Set the time, date and year manually.
Notifications
Browse the list and turn off notifications temporarily.
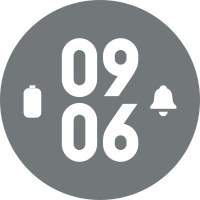
Watch faces
Select the watch face that matches your style.

Screen brightness
Adjust the light intensity in 5 steps.

Next
Tap the symbol to access more parameters.

Screen 2

Alert timeout
Controls the duration of your vibrating alerts.
Safe Mode
Restricts access to advanced features.
Screen wake-up
Controls how you wake your watch display.

About the watch
Shows the device ID, version information etc.

Back
Tap the symbol to go back to the first screen.

To set the Date and Time, start by pressing the Back key to open the menu and tap Settings  .
.

Tap to select Date and time  on the Settings screen.

Select the hours or minutes and tap the red arrows to adjust the time. Tap Next  to set the year.
Tap the red arrows to set the year and tap Next to set the date.

Select the month or day and tap the red arrows to set the date. Tap Next to finish.

A screen appears to confirm that a new date and time has been set. Tap OK to return to the Settings screen.
To adjust the Brightness, start by pressing the Back key to open the menu and tap Settings  .
.

Tap to select Brightness  on the Settings screen.

Use the buttons to adjust the brightness and tap Done  .
.
Please note: Changing the Alert Timeout will not have any effect on safety critical notifications.
To change the Alert Timeout, start by pressing the Back key to open the menu and tap Settings  .
.

Tap Next  to open the 2nd Settings menu.
Tap Alert Timeout  to open the panel.

Choose between 10, 20 and 30 seconds and tap Done  .
.
Normally you’ll leave your watch on all the time and use your wrist to wake-up and turn off your watch screen. We suggest that you only use the Home key to turn off your watch if you don’t plan to use it for a period of time, since your watch might need up to 30s to synchronize to the system when you turn it back on.
To activate the Screen Wake-Up, start by pressing the Back key to open the menu and tap Settings  .
.
Tap Next  to open the 2nd Settings menu.
Tap Screen Wake-Up  to open the panel.

Use the switch  to turn it On/Off and tap Done
  .
.
To use Safe Mode, start by pressing the Back key to open the Menu and tap Settings  .
.
Tap Next  to open the 2nd Settings menu.
Tap Safe Mode  to open the panel.

Tap the lock  to activate it.

When Safe Mode is on, a dialog appears if you try to access advanced features.

Hold down the Home key while pressing the Back key five times. Tap OK to return to the watch face.
To return to Factory Settings, start by pressing the Back key to open the Menu and tap Settings  .
.

Hold down both keys for 7s to initiate a factory reset. Tap YES to confirm. The current pairing data will also be removed.
You can customize the watch face to suit your various styles. Do you want a numeric or a minimalistic look? The watch offers a selection of designs to choose from.
To customize the watch face, start by pressing the Back key to open the menu and tap Settings  .
.

Tap to select Watch Face  on the Settings screen.

The current watch face is fronted in the gallery.

Use the left  and right
  arrows to toggle between the available watch faces.

Use the switch  to toggle between the dark and light version of the watch face.
Tap the watch face to select it.

The selected watch face is now featured on your home screen.
Light

Dark

Light

Dark

Light

Dark

Light

Dark

Light

Dark

Light

Dark

Your watch can be fitted with virtually any band that features a lug width of 20 mm. Use the method below to attach a new band.

Insert one end of the band’s spring bar into the watch’s lug.

Slide the spring bar inwards and connect the band.
While not required, we recommend that you take the time to install the Assistant app from Bellman on your Smartphone or Tablet. Home notifications will go directly to your watch receiver and your smartphone. Additionally, you can receive call notifications and messages on your watch receiver.
The Assistant app from Bellman is free of charge and available for both iOS and Android devices.
For additional information on the Assistant App, please visit The Assistant App Guide.


Enjoy clear and distinct notifications on your mobile phone, tablet and even your smart watch.

The home screen provides an overview of notifications, to and from your phone. Tap one to temporarily turn it off.
Another benefit is that your Watch Receiver will synchronize the time with your mobile phone automatically, making it unnecessary to set the time, time zone and date manually.
Download the app and follow the prompts on the screen.


To edit your devices, start by opening the menu and select My devices in the list.

Tap the Edit button to select the device you want to monitor.

Use the device dashboard to monitor for instance the device’s battery level and Bluetooth connection status.

A pop-up will appear on your home screen when a new software version is available. Tap OK to proceed.

1 Browse the device list to find the first unit you want to update. Tap the green button on the device card to initiate the update.

2 Follow the on-screen instructions during the installation procedure. When the installation is completed, the device will perform a restart. Please be patient, this can take a few minutes.

3 Browse the list to find the next device you want to update and tap the green button on the device card to proceed.
Please make sure to update all units in the list, so you don’t miss out on any new and exciting features.

You can also update your unit from the device dashboard. Just browse to the bottom of the page and tap Update device.
If the link is greyed out, and the red dot is gone, there are no new updates available.

Do you want your watch to vibrate for messages and calls on your phone when you are out and about?
Note: Make sure you are within range of the Bridge before setting up the direct connection.
1 First, tap the green button to identify your watch and create a private connection. (If the button is greyed out, the connection has already been established.)

2 Then, tap the switch to activate a direct connection.

By establishing a direct phone-to-watch connection, your watch will alert for calls, SMS and notifications outside home too.
Please note that it will not alert for Home notifications such as visitors and smoke.

Tap the switch if you want to turn off the direct connection between your phone and watch.

If your Bellman system features multiple watches, tap the green button to identify your watch and create a private connection.

By activating a private connection, calls and notifications on your mobile phone will only generate alerts on your watch.

If you want to deactivate the private connection, just tap the switch.

Start by tapping the Edit button in the list to select the device you want to remove from your mobile phone.

Scroll to the bottom of the screen and tap Remove to disconnect it from your mobile phone. Note that it will remain connected to the Bellman receivers and other phones.

A dialog appears that shows the associated notifications that are removed from the Assistant app as a result. Tap OK to confirm.


Signal and radio keys let you personalize how your Bellman system works.
Signal key: Choose which notification icon appears on your watch when a transmitter is activated.
Radio key: Slightly changes the system's radio frequency. This can help prevent interference from nearby electronics and keep multiple Bellman systems operating independently in places such as apartment buildings, dorms, and community living centers.
These adjustments are generally simple, but please contact us if you would like assistance.

Use the Signal key to change which notification appears on your watch for each transmitter. This is especially useful when you have two or more of the same transmitter.
A push button can display the  Visitor notification.
A second push button worn by your partner can display the  Assistance notification.
Select a transmitter tab and follow the instructions to adjust its Signal key.

You can set the Signal key to get the notification you like. If you for example want the notification Visitor, then adjust the Signal key setting to  .
.
The telephone transmitter has 3 different inputs. Configure the notification you would like to receive based on the input. TEST is the main input, the RJ11(Landline phone).

TEST

EXT TRIG

EXT TRIG
RJ11
Lift the front cover to access the signal key, then toggle the switches.
Note: Ignore the radio key switches unless you are also changing the radio keys.
Source
Icon
Message
• TEST
• RJ11
(Landline phone)
Phone call
• EXT TRIG
(Mobile phone sensor)
Sensor
• EXT TRIG
(Other accessory)
Visitor

Source
Icon
Message
• TEST
• RJ11
(Landline phone)
Phone call
• EXT TRIG
(Mobile phone sensor)
Sensor
• EXT TRIG
(Other accessory)

Guest

Source
Icon
Message
• TEST
• RJ11
(Landline phone)
Phone call
• EXT TRIG
(Mobile phone sensor)
Sensor
• EXT TRIG
(Other accessory)
Phone call

Source
Icon
Message
• TEST
• RJ11
(Landline phone)
Phone call
• EXT TRIG
(Mobile phone sensor)
Sensor
• EXT TRIG
(Other accessory)

Baby

Source
Icon
Message
• TEST
• RJ11
(Landline phone)
Phone call
• EXT TRIG
(Mobile phone sensor)
Sensor
• EXT TRIG
(Other accessory)
Baby

Source
Icon
Message
• TEST
• RJ11
(Landline phone)
Sensor
• EXT TRIG
(Mobile phone sensor)
Baby
• EXT TRIG
(Other accessory)
Visitor

Source
Icon
Message
• TEST
• RJ11
(Landline phone)
Baby
• EXT TRIG
(Mobile phone sensor)
Phone call
• EXT TRIG
(Other accessory)
Guest

Source
Icon
Message
• TEST
• RJ11
(Landline phone)
Sensor
• EXT TRIG
(Mobile phone sensor)
Phone call
• EXT TRIG
(Other accessory)
Baby

Source
Icon
Message
• TEST
• RJ11
(Landline phone)
Sensor
• EXT TRIG
(Mobile phone sensor)
Phone call
• EXT TRIG
(Other accessory)
Visitor

Source
Icon
Message
• TEST
• RJ11
(Landline phone)
Sensor
• EXT TRIG
(Mobile phone sensor)
Phone call
• EXT TRIG
(Other accessory)
Guest

Source
Icon
Message
• TEST
• RJ11
(Landline phone)
Sensor
• EXT TRIG
(Mobile phone sensor)
Phone call
• EXT TRIG
(Other accessory)
Sensor

Source
Icon
Message
• TEST
• RJ11
(Landline phone)
Sensor
• EXT TRIG
(Mobile phone sensor)
Phone call
• EXT TRIG
(Other accessory)
Baby

Source
Icon
Message
• TEST
• RJ11
(Landline phone)
Sensor
• EXT TRIG
(Mobile phone sensor)
Phone call
• EXT TRIG
(Other accessory)
Baby

Source
Icon
Message
• TEST
• RJ11
(Landline phone)
Baby
• EXT TRIG
(Mobile phone sensor)
Phone call
• EXT TRIG
(Other accessory)
Visitor

Source
Icon
Message
• TEST
• RJ11
(Landline phone)

CO warning
• EXT TRIG
(Mobile phone sensor)
CO warning
• EXT TRIG
(Other accessory)
CO warning

Source
Icon
Message
• TEST
• RJ11
(Landline phone)

Smoke
• EXT TRIG
(Mobile phone sensor)
Smoke
• EXT TRIG
(Other accessory)
Smoke

You can set the Signal key to get the notification you like. If you for example want the notification  Sensor, then adjust the Signal key setting to
  .
.
The doorbell transmitter has 3 different inputs. Configure the notification you would like to receive based on the input. TEST is the main input, the internal microphone.
TEST
INT MIC
EXT MIC
EXT TRIG
Lift the front cover to access the signal key, then toggle the switches.
The 4th switch marked in red is only used for magnetic detection.
Note: Ignore the radio key switches unless you are also changing the radio keys.

Source
Icon
Message
• TEST
• INT MIC
Visitor
• EXT MIC
(Eg. Intercom)
Guest
• EXT TRIG
(Eg. Wired doorbell)
Visitor

Source
Icon
Message
• TEST
• INT MIC
Guest
• EXT MIC
(Eg. Intercom)
Visitor
• EXT TRIG
(Eg. Wired doorbell)
Guest

Source
Icon
Message
• TEST
• INT MIC
Visitor
• EXT MIC
(Eg. Intercom)
Guest
• EXT TRIG
(Eg. Wired doorbell)
Baby

Source
Icon
Message
• TEST
• INT MIC
Guest
• EXT MIC
(Eg. Intercom)
Visitor
• EXT TRIG
(Eg. Wired doorbell)
Baby

Source
Icon
Message
• TEST
• INT MIC
Visitor
• EXT MIC
(Eg. Intercom)
Guest
• EXT TRIG
(Eg. Wired doorbell)
Sensor

Source
Icon
Message
• TEST
• INT MIC
Baby
• EXT MIC
(Eg. Intercom)
Visitor
• EXT TRIG
(Eg. Wired doorbell)
Baby

Source
Icon
Message
• TEST
• INT MIC
Visitor
• EXT MIC
(Eg. Intercom)
Guest
• EXT TRIG
(Eg. Wired doorbell)
CO

Source
Icon
Message
• TEST
• INT MIC
Visitor
• EXT MIC
(Eg. Intercom)
Guest
• EXT TRIG
(Eg. Wired doorbell)
Smoke

You can set the Signal key to get the notification you like. If you for example want the notification  Guest, then adjust the Signal key setting to
  .
.
The baby monitor transmitter has 2 different inputs. Configure the notification you would like to receive based on the input. TEST is the main input, the internal microphone
TEST
MIC
EXT TRIG
Lift the front cover to access the signal key, then toggle the switches.
Note: Ignore the radio key switches unless you are also changing the radio keys.
Source
Icon
Message
• TEST
• MIC (Sound)
Baby
• EXT TRIG
(Eg. Contact mat)
Visitor
Source
Icon
Message
• TEST
• MIC (Sound)
Baby
• EXT TRIG
(Eg. Contact mat)
Guest
Source
Icon
Message
• TEST
• MIC (Sound)

Baby
• EXT TRIG
(Eg. Contact mat)
Baby
Source
Icon
Message
• TEST
• MIC (Sound)
Baby
• EXT TRIG
(Eg. Contact mat)
Baby

You can set the Signal key to get the notification you like. If you for example want the notification Attention, then adjust the Signal key setting to to  .
.
The push button transmitter has 1 input: the main button. Configure the notification you would like to receive for this input.
Front button
Pull off the front cover with a flat-head screwdriver by pressing in the notches on the edges, then toggle the switches.
Note: Ignore the radio key switches unless you are also changing the radio keys.

Source
Icon
Message
Front button

Invalid

Source
Icon
Message
Front button
Baby

Source
Icon
Message
Front button
Guest

Source
Icon
Message
Front button
Sensor

Source
Icon
Message
Front button
Invalid

Source
Icon
Message
Front button

Attention

Source
Icon
Message
Front button
Phone call

Source
Icon
Message
Front button
Visitor
If your Bellman system activates without an apparent cause, nearby electronics or another Bellman system may be creating radio interference. Changing the radio key slightly changes the operating frequency. Set all units in one Bellman system to the same radio key, especially when multiple systems are used nearby, such as in apartment buildings, dorms, or community living centers. The radio key switches are located under the transmitter cover.

Open the transmitter front cover and move any radio key switch to the Up = On position to change the radio key. (By default, all radio key switches are positioned Down = Off. )

Press and hold the Test/Function button on the receiver until the green and yellow front LEDs blink alternately. Release the button.

Press both Test buttons simultaneously on the transmitter within 30 seconds to send the new radio key.
Note: Some products only have one Test button.

All front LEDs on the receiver blink sequentially to show that the radio key has been changed. It then returns to normal mode.
Note: All Bellman units must be set to the same radio key in order to operate as a group.
The Watch Receiver is a wearable part of the alerting system. Compatible transmitters send home events to the Bridge, and the Bridge relays them to the watch.
The watch alerts you with vibration and a clear on-screen symbol or message, helping you identify what needs your attention without relying on sound.
For home alerts, the watch works with:
A BE1521 Bridge
One or more compatible transmitters for the events you want to monitor
The included pocket charger and a suitable USB power source
The Assistant app is optional, but recommended for easier setup, automatic time synchronization, and supported phone notifications.
No. You can set up and use the watch with the Bridge without installing the Assistant app.
The free app is recommended because it can:
Synchronize the watch's time, date, and time zone automatically
Send supported calls and messages to the watch
Help manage connected devices and notifications
Before the first setup, place the watch in its charger for at least 15 minutes. Select your language, keep the watch near the Bridge, and follow the instructions on the watch screen.
When prompted, press and hold the top test button on the Bridge until its LEDs begin blinking in an alternating pattern. The watch will confirm when the connection is complete.
To test the mobile connection later, press the Bridge's top test button. Test transmitter and receiver communication separately using the Bridge's lower test button or the transmitter's test function.
A full charge can provide up to one week of operating time, depending on use. Charging can take up to approximately two hours.
Place the watch in the pocket charger and connect the charger to a 5 V, 1.0 A USB power source. Charging starts automatically, and the watch displays a green battery indicator while it is charging.
The watch uses vibration together with an on-screen symbol and message. The displayed notification identifies the event, such as a visitor, telephone call, baby monitor, or smoke alarm.
Press the Home key, press the Back key, or tap the screen to acknowledge the alert and return to the watch face. You can also review recent notifications from the notification history.
Available alerts depend on the transmitters and accessories installed in your system. Common examples include:
Doorbell or visitor alerts
Baby monitor alerts
Smoke and carbon monoxide alerts
Telephone alerts
Push-button or assistance alerts
Supported calls and messages from a connected phone
On supported setups, the watch can use a direct connection to receive calls, SMS, and compatible phone notifications when it is away from the Bridge.
Create the private phone-to-watch connection before leaving home. A direct connection does not provide home notifications, such as visitor or smoke alerts, while the watch is away from the alerting system.
Yes. Do Not Disturb can silence most watch notifications for a selected period. Smoke and carbon monoxide alerts cannot be silenced with Do Not Disturb.
You can also temporarily turn off an individual notification in the watch settings. This changes what appears on the watch; it does not remove the transmitter from the alerting system.
Yes. You can expand the system as your needs change. Follow the transmitter's instructions to add it to the alerting system, then activate the transmitter so the watch can add its associated notification.
Notifications can be turned off or removed from the watch settings. Removing a notification from the watch does not automatically remove the transmitter from the rest of the system.
An out-of-range symbol appears when the watch loses its connection to the Bridge. While disconnected, the watch cannot receive home notifications from the alerting system.
Move closer to the Bridge and allow the watch time to reconnect. Walls, floors, building materials, and nearby electronics can reduce the practical range. If the problem continues, test the connection from the Bridge.
The watch includes several everyday and accessibility settings:
Timer and alarm functions
Night Mode and screen wake-up controls
Adjustable brightness and alert timeout
Six watch-face designs with light and dark options
Support for standard watch bands with a 20 mm lug width
Safe Mode limits access to advanced watch features and settings. It can be useful when the wearer only needs the primary watch and notification functions.
Factory reset clears the watch's current pairing data and returns its settings to their defaults. Use it only when you intend to set up the watch again. To begin a reset, press and hold both side keys for approximately seven seconds, then confirm the on-screen prompt.
The watch is rated IP67 for water and dust resistance, but it is not designed for swimming or prolonged water exposure. Water resistance can decrease over time and may be reduced if the watch is dropped.
Do not wear it while swimming, in a hot shower or hot spring, or underwater.
Avoid salt water, soap, and cleaning agents.
Clean it with a nonabrasive, lint-free cloth lightly dampened with fresh water.
Allow the watch and charger to dry completely before charging.
Do not rely on the watch as the only means of security in situations where a missed alert could be life-threatening.
The attention signal helps contact people nearby; it is not a personal alarm or emergency-calling service.
If you use a pacemaker, keep the watch more than 6 inches (15 cm) from it, wear the watch on the opposite wrist, and consult your physician or device manufacturer if you have concerns.
Stop using the watch and seek advice if you suspect interference with a medical device.
The Watch Receiver has a two-year warranty from the date of purchase for defects caused by faulty materials or workmanship under normal use. Keep your proof of purchase, and review the warranty terms for exclusions such as misuse, accidents, unauthorized repairs, and normal wear.
The expected service life is approximately five years when the product is used and maintained as directed. Battery performance and water resistance may gradually decrease with age and use.
The symbol warns that your watch is temporarily out-of-range and that you will not receive any notifications. Move to an area that is closer to your notification system.
This symbol means that your notifications are temporarily silenced. Tap the symbol to turn the notifications back on. Please note that critical notifications like e.g. smoke and CO cannot be turned off.
The battery on your watch is depleted. Attach your watch to the charging dock to charge the battery, see Charging your watch. It can take up to 2 hours to fully charge the watch.
Make sure you are not wearing gloves, and that your hands are clean.
Make sure you are not using any sharp objects or only touching the screen with your fingernails.
Please note that humid conditions or exposure to water may prevent the touchscreen from function properly. If you have very dry skin, try to use some skin lotion to improve the touch response.
Ensure that your watch software is updated to the latest version.
If the screen is scratched or damaged, contact an authorized service center for assistance.
Disconnect your watch from the charger and let the battery run out until it’s completely dead.
Reconnect your watch to the charger and wait for at least 30 minutes.
Press the Home key to start your watch.
If the problem persists, contact an authorized service center for assistance.
Bring your watch close to the bridge and make sure the watch is turned on.
Press the top Test button on the bridge to make sure the connection is not lost. Bring the device you want to add nearby, make sure it’s turned on, and try to connect it again, see Adding a transmitter.
There is probably another Bellman alerting system installed nearby that triggers your system. Change the radio key on all units, see Changing the radio key in the Bridge Transceiver user manual.
If an Out-Of-Range symbol blinks on the watch face, move to an area that is closer to your Bellman system. Obstacles, such as walls or electrical equipment close to the devices can reduce the Bluetooth coverage area significantly. Examples of electrical equipment includes, but is not limited to, microwave ovens, Wi-Fi routers and plasma TV screens.
If the problem remains, make sure that the bridge is connected to power, and that the backup batteries are fresh. To test the connection, press the top Test button on the bridge. A message will appear on your watch to confirm that the connection is OK.
If no Out-Of-Range symbol appears on your watch face, there are two possibilities:
The connection between the transmitter and the bridge is lost. Move the units closer together. To test the connection, press the Test button(s) on the transmitter. If the bottom LED on the Bridge lights up in green, the connection between the transmitter and the bridge is OK.
The Transmitter doesn’t trigger correctly.
Check all connections to the transmitter, and make sure that the batteries are not depleted.
This is normal and should not affect your watch’s lifespan or performance. If your watch overheats or feels hot for a prolonged period, do not use it for a while.
If your watch continues to overheat, contact an authorized service center for assistance.
Make sure that the charging dock is connected to power and that you have attached your watch to the charging dock correctly, see Charging your watch.
A charging symbol appears, and short vibration occurs to confirm that charging has started. If the display is turned off, press any key to check the charging status.
